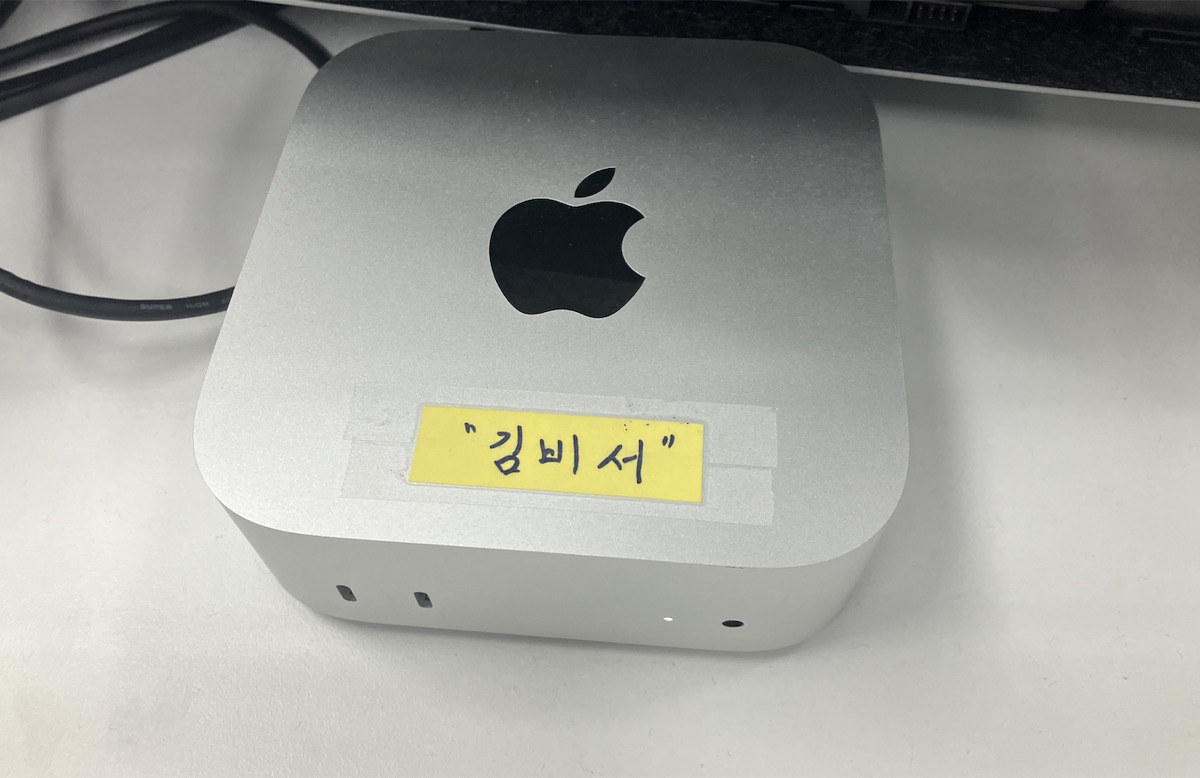
I had a Mac mini at the office — bought it for work, but it was just sitting there doing nothing. Had some free time, so I decided to set up OpenClaw on it.
Started with simple assistant tasks. Email cleanup, calendar management — that kind of thing. Emails pile up every day, dozens unread. Schedule-related emails come in but never get registered to the calendar.
During setup, I learned two important things. First, connecting OpenClaw to Claude via OAuth can get your account blocked. Second, running everything through API gets expensive fast. I found a way to avoid both problems and optimize costs.
This is that setup story. From OpenClaw installation to avoiding account blocks, to building a near-zero cost structure.
Table of Contents
Prep Work
- Mac mini Base Setup - Homebrew, Node.js
- Install Claude Code CLI - Official script + auth
- Get API Key & Bot Token - Claude API key, Telegram bot token
Installation
- Install OpenClaw - Install + pairing
- Google Cloud API - Gmail, Calendar API
Usage
- Build Features - Email cleanup, Telegram reports, calendar
- Cost Optimization - API vs CLI, batch script strategy
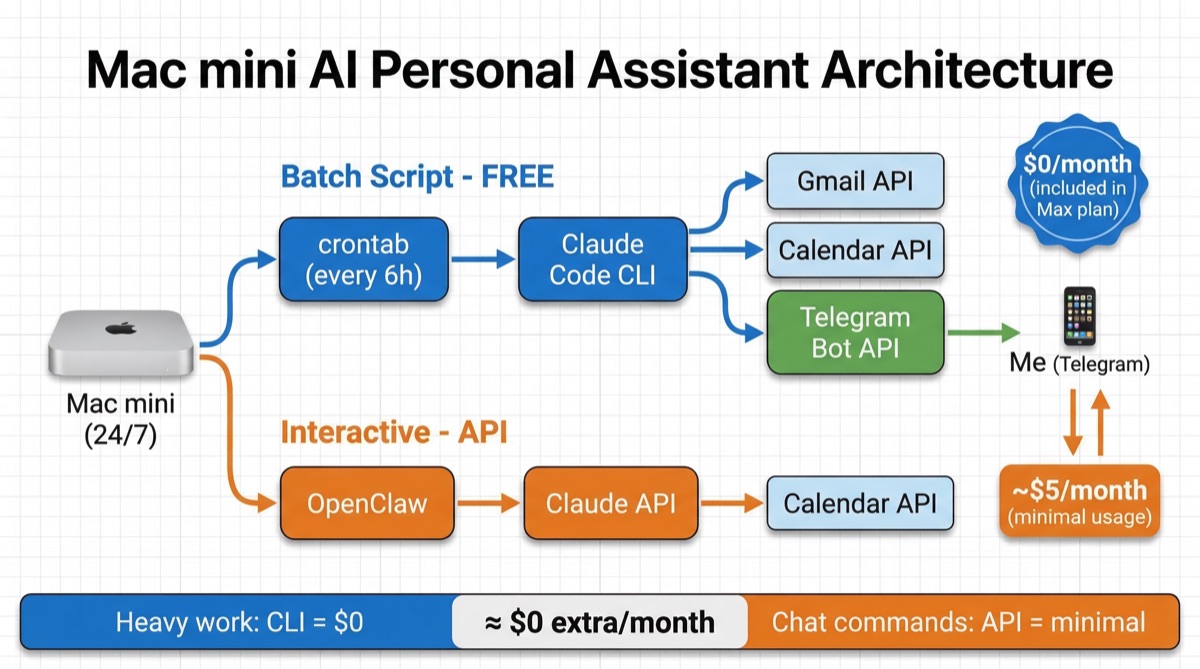
Here’s the overall architecture:
Prep Work
Step 1: Mac mini Base Setup
To turn a Mac mini into an assistant, you need the basics. macOS makes it easy — just get Homebrew and the rest follows.
# Install Homebrew (skip if already installed)
/bin/bash -c "$(curl -fsSL https://raw.githubusercontent.com/Homebrew/install/HEAD/install.sh)"

# Install Node.js
brew install node

# Verify
node -v  # v24.x or higher recommended
npm -v
Why Mac mini? Low power consumption for 24/7 operation, macOS for easy dev environment setup, and zero noise.
Step 2: Install Claude Code CLI
This is the key piece. Claude Code CLI is what makes the cost savings possible later.
The official installation is documented at Claude Code official docs.
# Official Claude Code installation
curl -fsSL https://claude.ai/install.sh | bash
After installation, run the claude command in your terminal. On first launch, it opens a browser for Anthropic login. You need to be on the Max plan. With Max, CLI usage is included in your subscription — no extra charges.
Why does this matter? Keep reading. Just remember: CLI = no additional cost.
Step 3: Get Your API Key and Bot Token
When you install OpenClaw, it walks you through an interactive setup that asks for credentials. You need to have these ready beforehand, or you’ll get stuck mid-setup.
Two things you need:
Claude API Key
Sign up at Anthropic Console and generate an API key.
- Go to Anthropic Console → Sign up
- Create a new key under API Keys
- You’ll get a key starting with
sk-ant-
Copy it and save it somewhere. This is separate from the CLI authentication.
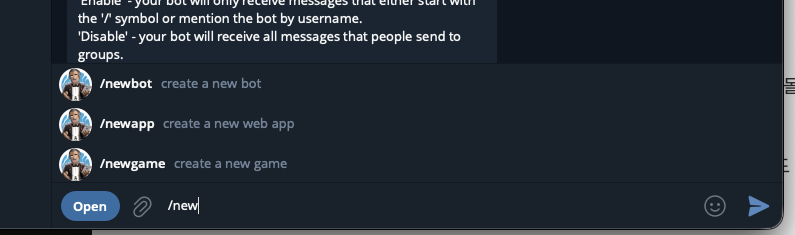
Telegram Bot Token
You need a channel for your assistant to report through. I chose Telegram because its Bot API is free and powerful.
Signing up is easy — just need a phone number. No hassle there.
The bot creation part was a bit confusing though. I’d recommend installing the Telegram desktop app and doing it there. Bigger screen, easier to copy tokens around.
- Install Telegram Desktop
- Sign up with your phone number
- Create a bot via BotFather
# In Telegram Desktop, search for @BotFather and start a chat

/newbot
# Enter bot name (e.g., MyAssistantBot)
# Enter bot username (e.g., my_assistant_2026_bot)
# Username must end with _bot

# You'll receive a token — save it
# e.g., 7123456789:AAH1234abcd5678efgh...
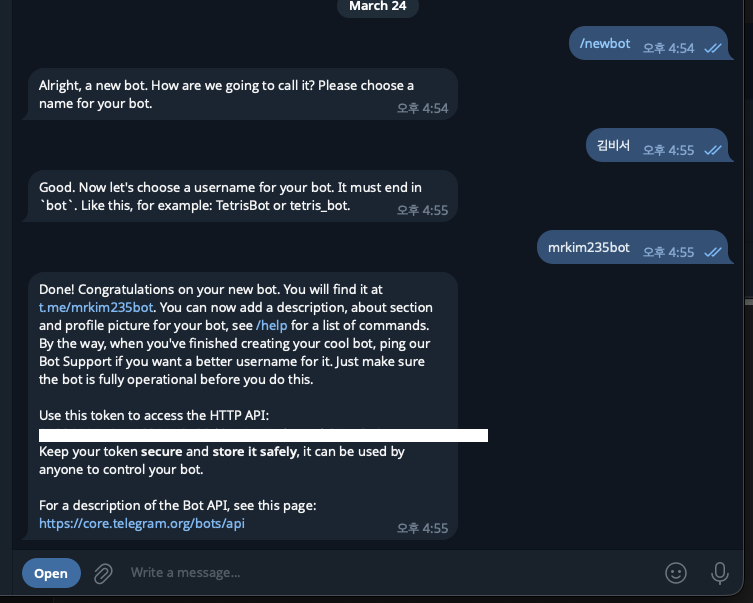
One thing that tripped me up: BotFather asks for both “name” and “username” — they’re different. Name is the display name, username is a unique ID that must end with _bot. Miss that and you’ll keep getting errors.
Now you have your Claude API key and Telegram bot token saved. Ready to go.
Installation
Step 4: Install OpenClaw
OpenClaw is an open-source AI agent that bridges messaging platforms (Telegram, Slack, etc.) with AI models. It lets you interact with Claude directly through Telegram.
The official installation is available at OpenClaw’s official site.
# Official OpenClaw installation
curl -fsSL https://openclaw.ai/install.sh | bash
After installation, the interactive setup begins. Follow the prompts — there’s a critical choice in the middle.
- When asked for AI auth method → select Claude auth
- Next it asks Claude API vs Claude OAuth → always pick API
This is critical. Never pick OAuth. OAuth integration can get your account blocked. You must select API.
Once you pick API, just paste in the credentials you prepared:
- Claude API key → paste
sk-ant-xxxxx - Telegram bot token → paste
7123456789:AAH...
Once you’ve entered everything, OpenClaw handles the rest.
Bot Pairing
After setup, start a conversation with your bot in Telegram. It will give you a pairing key.
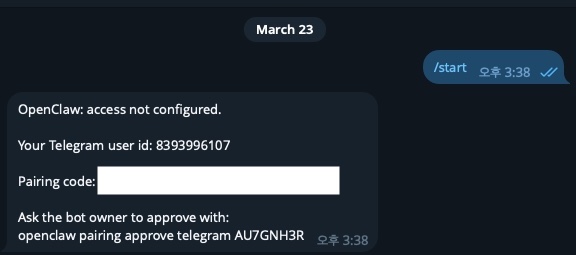
Copy that key and enter it in OpenClaw to complete the pairing.
At this point, you can message your bot on Telegram and Claude will respond.
Note: the initial setup process consumes about $10-20 in API costs. OpenClaw runs various tests and verifications during first-time setup. This is unavoidable.
“Wait, doesn’t that cost money?” Yes. OpenClaw uses the API when processing commands from Telegram. But this only fires for direct Telegram interactions — which are infrequent. The heavy lifting uses a different approach, which I’ll explain later.
Step 5: Google Cloud API Integration
This was honestly the most tedious part of the entire setup. Lots of steps. But it’s a one-time thing — follow along with the screenshots.
Sign Up for Google Cloud & Create Project
You probably have a Google account, but Cloud Console requires separate registration. Go to Google Cloud Console and sign up. It asks for payment info, but the free tier is more than enough.
Once signed up, create a project.
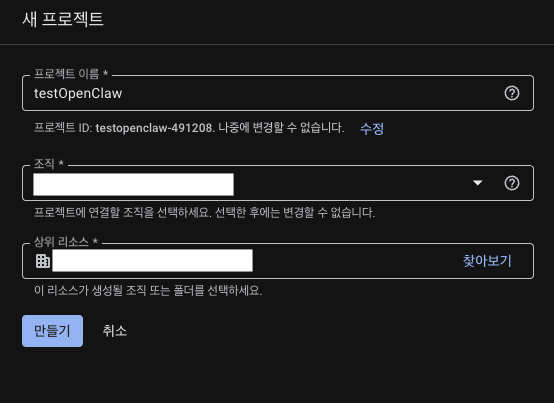
Name it anything you want.
Enable APIs
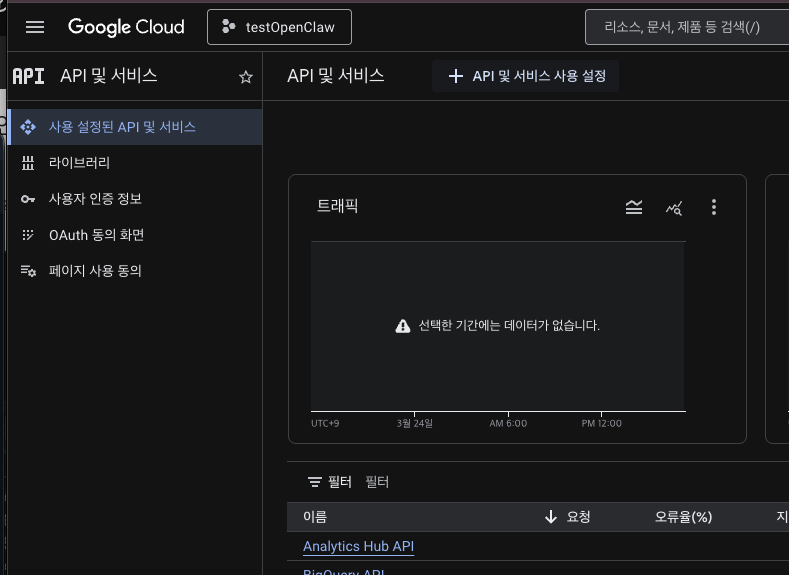
Open the hamburger menu on the left and navigate to APIs & Services.
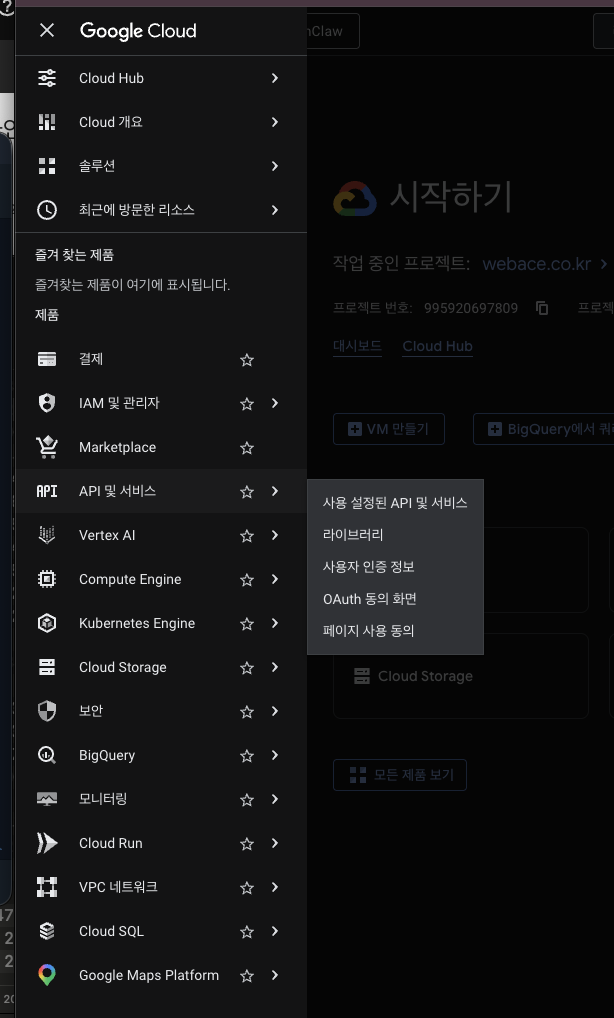
You’ll see the APIs & Services dashboard. Go to Library to search for APIs.
Search for the API by name.
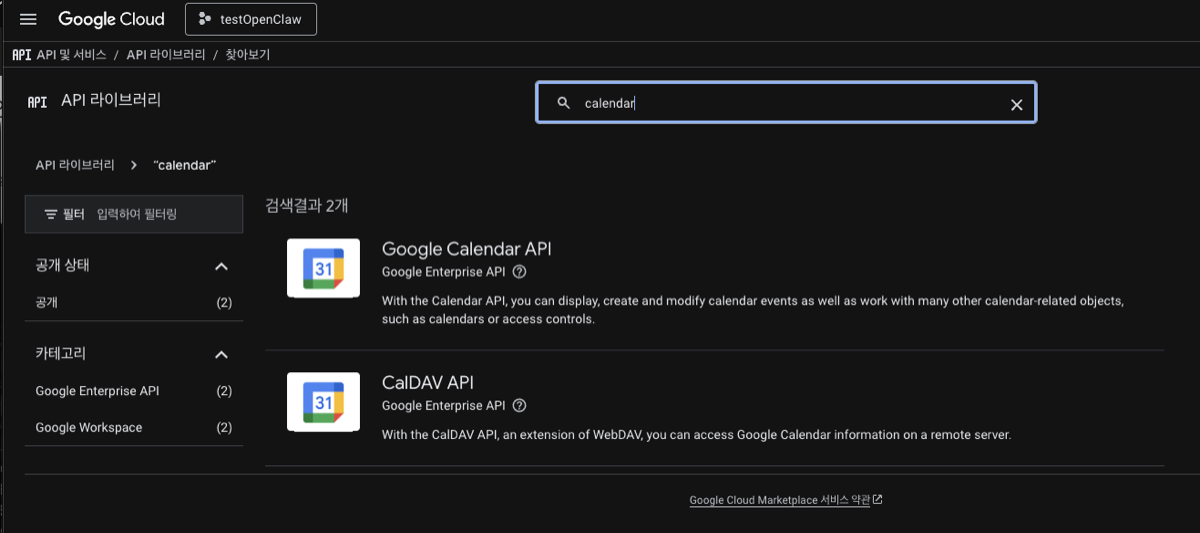
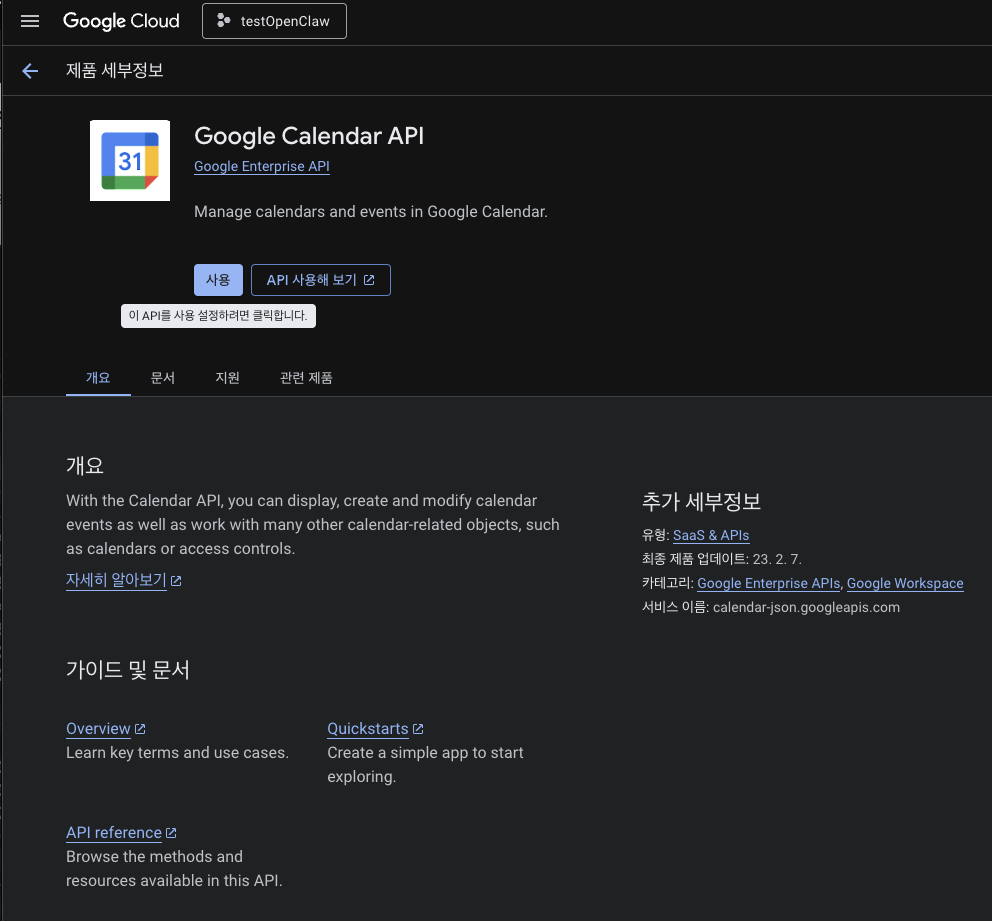
Click into it and hit Enable.
Repeat for each API you need.
Required:
- Gmail API — for reading/organizing emails
- Google Calendar API — for registering events
Optional:
- Google Sheets API, Google Docs API, Google Drive API
I enabled about 5, but 2 is enough if you only need email and calendar.
Set Up Credentials
After enabling APIs, you need to create credentials. Go to APIs & Services > Credentials.
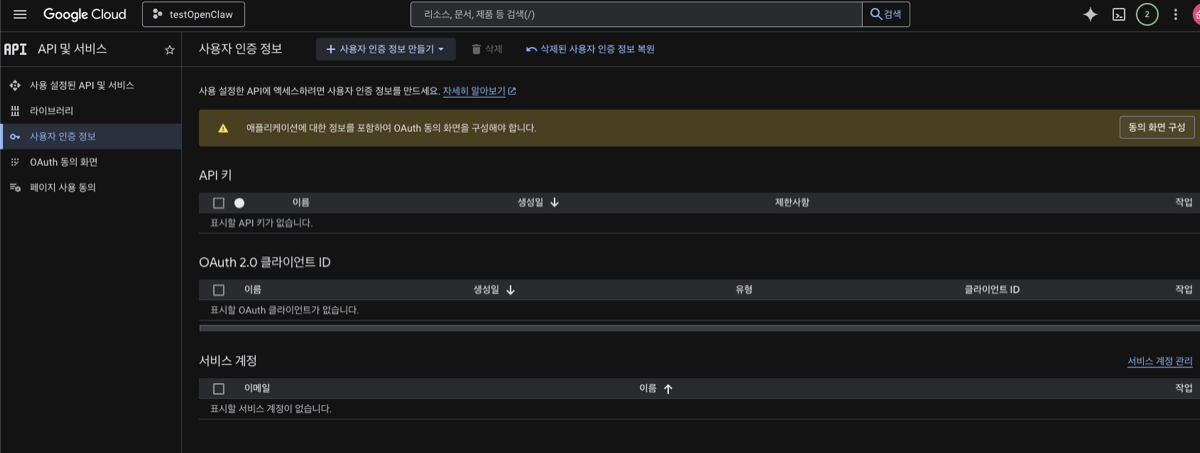
If it’s your first time, you’ll be asked to configure the OAuth consent screen first.
Configure OAuth Consent Screen
The Google Auth Platform screen appears. Click Get Started.
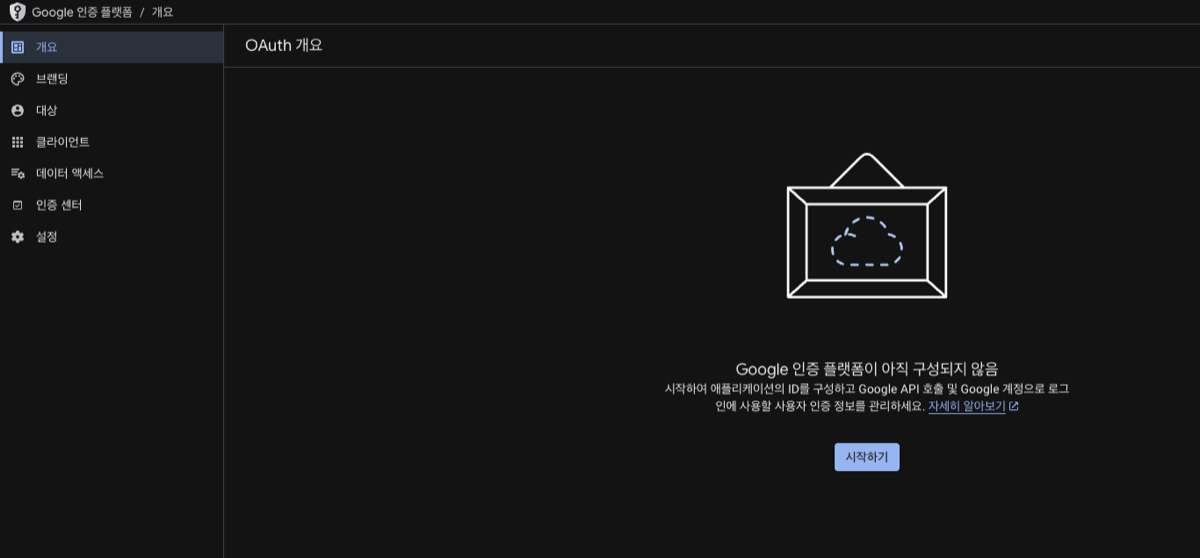
Project configuration proceeds in 4 steps.
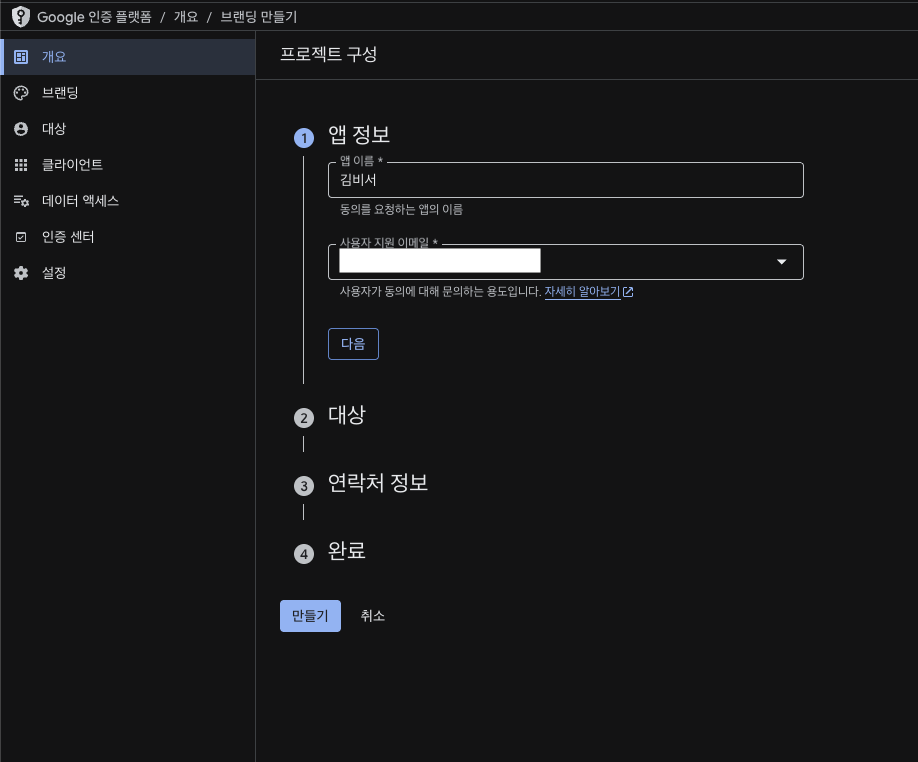
Step 1: App Info
Enter the app name and support email.
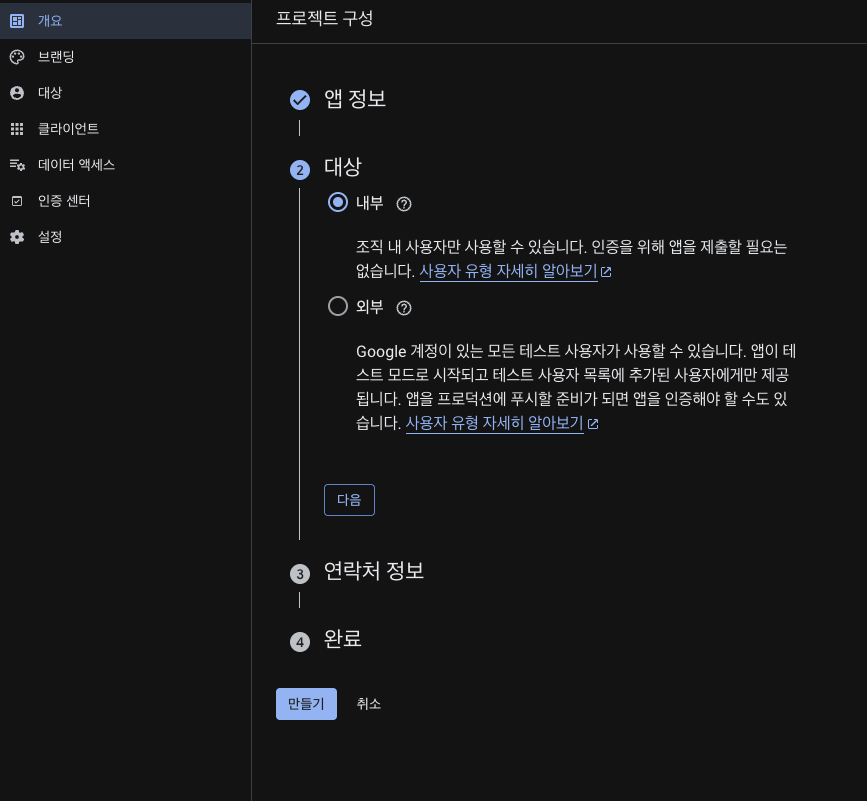
Step 2: Audience
Select user type. Choose Internal.
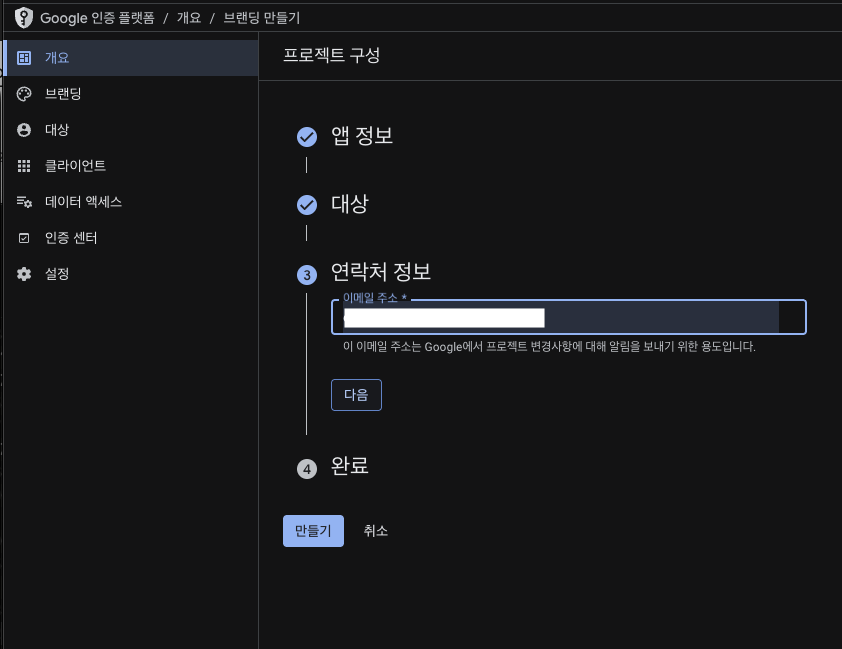
Step 3: Contact Info
It asks for an email address. Since it’s just for personal use, enter your own email.
Step 4: Complete
Agree to the Google API Services data policy and click Create.
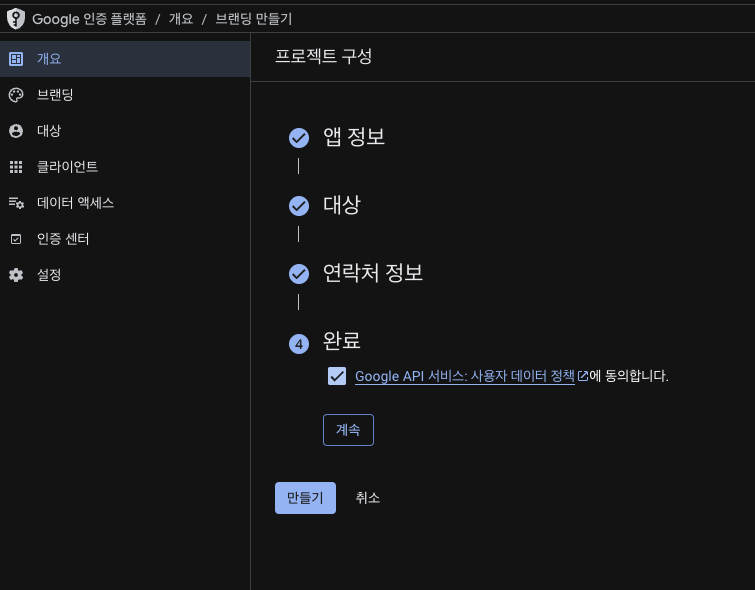
OAuth consent screen setup is done.
Create OAuth 2.0 Client ID
Go back to APIs & Services > Credentials from the left menu.

Click + Create Credentials at the top and select OAuth client ID.
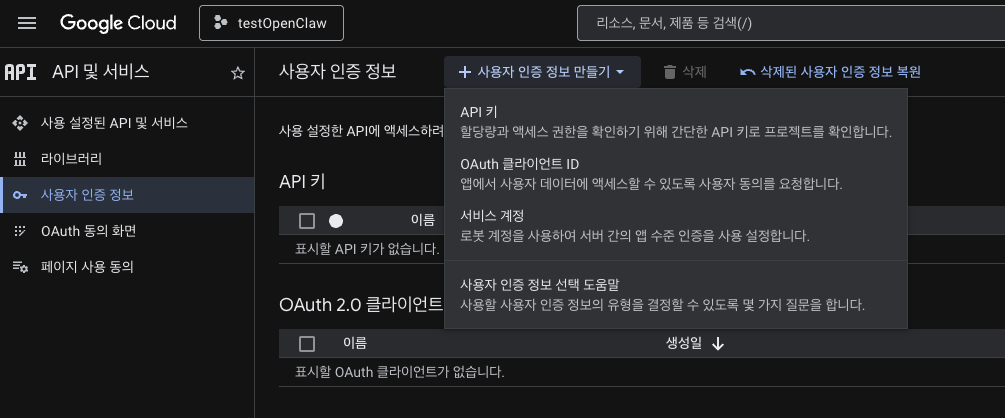
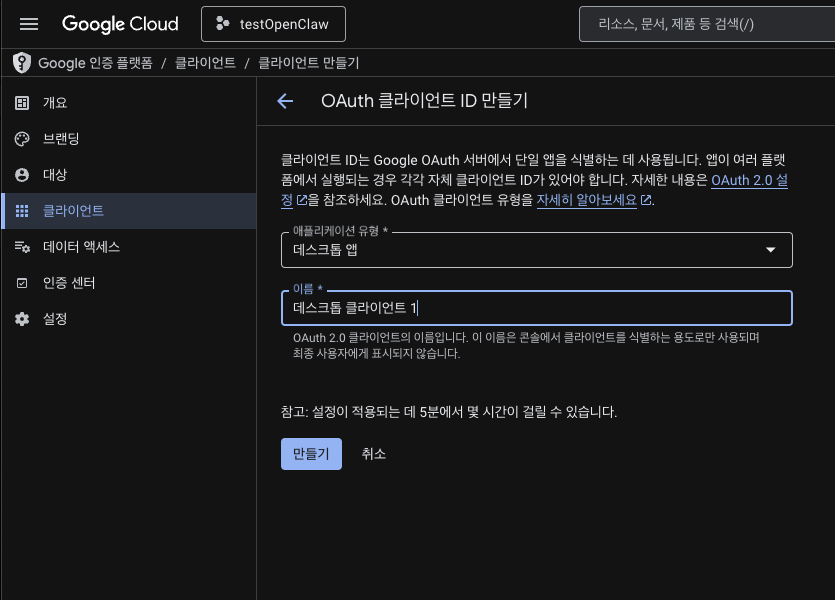
Select Desktop app as the application type.
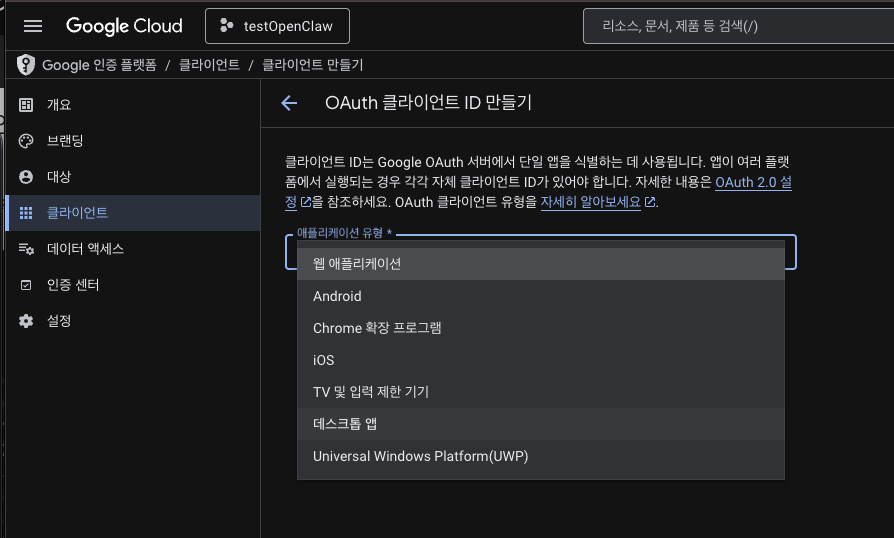
Enter any name and click Create.
Download credentials.json
A popup appears after creation. Click Download JSON.
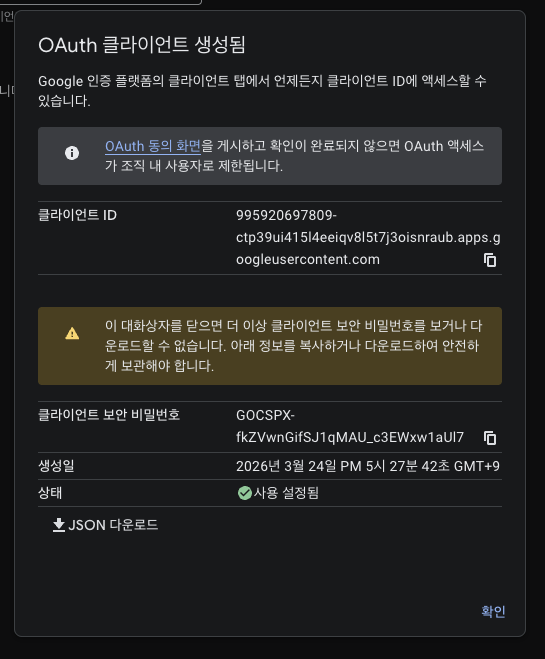
That’s your credentials.json file. This is the key to Google API authentication.
Connect to OpenClaw
Put the downloaded credentials.json in your Downloads folder, then tell OpenClaw to handle it. Message your bot on Telegram: “Set up Google API integration using the credentials.json in my Downloads folder” — and it takes care of the rest.
First run requires browser-based Google account auth. After that, tokens refresh automatically.
This is the most tedious stretch. But once it’s done, you never have to do it again.
Building the Actual Features
Setup done. Time to put the assistant to work. The key here is that you don’t write code yourself — you tell it what to do through conversation.
The Core Instruction: Batch + CLI
I told the bot this via Telegram:
Me: All tasks must be registered as batch scripts, and use
    claude code cli when executing them.
This is the crucial instruction. Telling OpenClaw to create batch jobs and run them through CLI. Why? Because of cost — I’ll explain later. Just go with it for now.
Setting Up Gmail Cleanup
Me: Auto-clean my Gmail every 6 hours.
    Archive promotional/marketing emails,
    summarize important ones and report via Telegram.
    If there are schedule-related emails, flag them separately.
That’s it. OpenClaw creates the batch script, registers it in crontab on a 6-hour cycle, and configures execution through Claude Code CLI. I didn’t write a single line of code.
Telegram Reports
Once set up, reports arrive in Telegram every 6 hours.
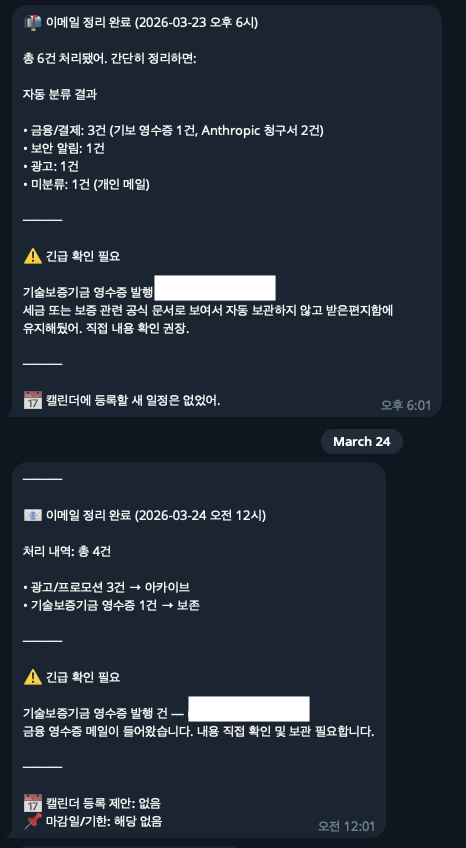
Important email summaries, schedule alerts, and archive results — all neatly formatted. By the time I wake up, my inbox is already sorted.
Schedule Emails → Telegram Confirmation → Calendar Registration
When a schedule-related email is detected, it asks via Telegram:
Bot: Schedule-related email detected.
     Kim: Proposing meeting 3/27 (Thu) 2:00 PM
     Register to calendar?

Me: Yes, register it.

Bot: Registered on Google Calendar.
     📅 3/27 (Thu) 14:00-15:00
     Title: Meeting with Kim
     Reminder: 30 min before
It’s a two-way conversation. Not just one-way reports — I respond via Telegram and it acts accordingly.
Adding More Features Through Conversation
Want more features later? Just ask.
Me: Every morning at 9AM, send me today's calendar schedule via Telegram.
Me: Once a week, compile email stats and report.
    Who sent the most emails, what's the ratio of important ones, etc.
Just say it and OpenClaw creates and registers the batch scripts. No coding required. You build your own personal assistant, one conversation at a time.
The Real Story: Cost Optimization
If you’ve read this far, you might be thinking: “Cool, but the API costs must add up.”
Right. Without optimization, running everything through API is genuinely scary. I checked the actual numbers — $35-55 per day. Use it for 20 days and that’s over $1,100 a month. Insane.
That’s exactly why I instructed “create batch scripts and run via CLI” from the start. The cost structure changes completely.
API vs CLI: The Cost Difference
Running entirely via API:
  - $35-55/day
  - 20 days/month: ~$1,100+
  - Running it like a daily assistant costs this much

Batch + CLI hybrid:
  - Batch tasks (CLI): Included in Max plan
  - Interactive tasks (API): Under $1/day
  - Heavy Telegram Q&A days: $10-20/day
The difference is staggering. API-only would cost over $1,100/month. Switch to CLI-centric and it’s under $1/day. Even on days when I use Telegram heavily for extra tasks, it’s only $10-20.
The Max plan is $100 or $200/month. I was already subscribing for development work. CLI usage is included, so batch tasks incur no additional cost.
Why Split It This Way?
Two channels serve different purposes:
OpenClaw (via API):
- When I directly command through Telegram
- Interactive tasks like “register this to calendar”
- API key is necessary — OpenClaw needs it to communicate with Claude
- Normal days: under $1. Heavy days: $10-20
Batch Scripts (via CLI):
- Automated email cleanup every 6 hours
- All heavy, repetitive work
- Runs through Claude Code CLI — included in Max plan
- Results sent via Telegram Bot API (free)
The key insight: OpenClaw handles Telegram I/O, while CLI handles the heavy lifting.
That’s why the initial instruction — “batch scripts + CLI” — matters so much. One sentence that dramatically cuts costs.
I wrote about thoughts on AI subscription costs before. The answer is squeezing maximum value from the subscription you’re already paying for.
Wrapping Up
One Mac mini. Sitting idle, now working as a personal assistant.
Here’s what it does:
- Cleans up Gmail every 6 hours and reports via Telegram
- Asks about schedule-related emails via Telegram and registers to Google Calendar
- Heavy tasks run through CLI, interactive tasks through API — cost optimized
The most satisfying part is the cost structure. Running everything through API would’ve been $10-30/month. With CLI, it’s all covered by the subscription I was already paying.
Next up, I’m thinking about adding Slack integration and weather alerts. But honestly, this alone is already surprisingly useful. Waking up to an email summary in Telegram is genuinely convenient.
If you have a Mac mini gathering dust, give it a try. Setup is a bit tedious, but once it’s done, it runs itself.
You’re paying for the subscription anyway — might as well put it to work.